Combo: Hermit and Market Square

|
This page is awaiting large-scale edits by the community to meet quality and format standards. The information on this page may be outdated. Join the #wiki-general channel on the Dominion Discord server to participate. |
| Hermit / Market Square | |||
|---|---|---|---|
| |||
| Info | |||
| Set(s) | Dark Ages | ||
| Type | Megaturn | ||


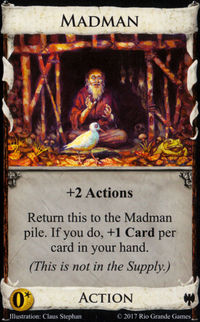
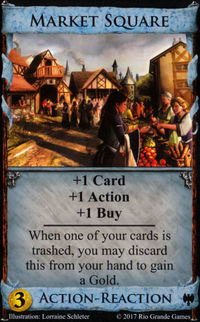
Hermit/Madman and Market Square is a unique megaturn combo. You use Hermits to pick up Market Squares, Hermits, and Madmen, and then use the Madmen in one huge turn to convert your Market Squares to Golds and redraw them multiple times.
Contents |
[edit] Article
This combo was discovered by Herowannabe, and this article about it was originally posted on the forum.
I want to preface this by saying that this is probably a combo for advanced players. It requires a careful balance, a knowledge of exactly what’s in your deck, as well precise timing to pull off correctly, without which your deck could easily flop.
The gist of the combo is this: grab as many Hermits as you can, then grab as many Market Squares as you can while you turn most of your Hermits into Madmen. Then, in one explosive mega-turn, use the Madmen to draw your whole deck then use the Market Squares and remaining Hermits and Madmen to simultaneously gain a whole bunch of golds and draw them into your hand, then buy a bunch of Victory cards and end the game. Sound far fetched? Let me explain.
[edit] Step 1 – Grab the Hermits
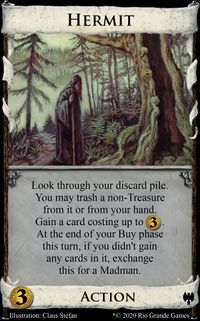
Ideally you should open Hermit-Hermit, then on your next turns, use the hermits to gain more hermits in addition to buying any hermits you can afford. If you can’t afford to buy a Hermit then don’t buy anything that turn and let the Hermit you played change into a Madman. (Note, if you draw any of your Madmen then resist the temptation to use them! You’ll need them later.) If you use the Hermits’ trashing ability, make sure you leave at least 1 estate/shelter/useless card in your deck to trash later.
Ideally you should aim to grab 9 of the Hermits, but if you can’t grab 9 then 7 will work (5 is less useful, but maybe not completely disastrous). There isn’t much use in gaining an even number of Hermits, so if you can’t get the 9th or 7th Hermit, don’t bother with the 8th or 6th. Move on to step 2 instead.
[edit] Step 2 – Turn Hermits into Madmen while grabbing Market Squares.
Start grabbing as many Market Squares as you can. You do not need to empty the market square pile completely- it’s a good idea to leave a few behind to pick up with your hermits on your megaturn if you think your opponent will leave them there.
At the same time start turning more Hermits into Madmen. Your goal should be to have exactly 3 more Madmen than you have Hermits (ie: 6 Madmen and 3 Hermits, or 5 and 2).
Also, beware of letting your deck grow too big (i.e., if your opponent is filling it with Curses/Ruins and you are Hermit/MSing them into golds). The ideal deck size is 29 cards or less. You’ll see why in the next step.
[edit] Step 3 – Determining when to pull the trigger
I made this its own step because sometimes even when your deck is ready you will want to wait a few turns before pulling the trigger.
There are many things to consider when deciding when to pull the trigger, but here are the most crucial ones:
- Your deck: it should be 29 cards or less, and is composed of your starting 7 coppers, 1-3 Estates/Shelters, exactly 3 more Madmen than you have Hermits, as many Market Squares as possible, and maybe a gold or two.
- Your hand: it should have at least 2 Madmen in it, and you haven’t been hit by any hand-size reduction attacks this turn. Pulling the trigger with only 1 Madman in hand is risky- you might miss drawing a second one.
- The kingdom: There should probably be enough nearly-empty piles that you can end the game quickly, and you want to make sure you don’t wait too long and give your opponent(s) enough time to snatch up too many provinces.
Beyond this I don’t know what else to tell you about deciding when to pull the trigger. At the very least I suggest that you practice this combo a few times solo or against a computer before trying it against a live opponent.
[edit] Step 4 – KaBOOM!
Pulling the trigger should go something like this:
- Play your first Madman, drawing 4 cards.
- Play your second Madman, drawing 7 cards.
- Play your third Madman, drawing 13 cards. Assuming you kept your deck 29 cards or smaller, you should now have your whole deck in your hand.
- Play your first Hermit, and trash that useless non-treasure card you have been holding on to this whole time. If you need more junk cards for your other hermit(s) to trash, make sure to pick one up now. Or if you can pick up those market squares you left behind to use later in the turn.
- As a reaction to your trashed card, discard all of those Market Squares in your hand and gain a fistful of gold.
- Play your fourth Madman, drawing all those Golds and Market Squares.
- Repeat with each Hermit/Madman pair that you have, using the last Hermit to pick up a silver, or maybe a card from a pile you want to empty.
Now you should have a giant hand full of Gold and Market Squares, with a spattering of copper. Play all of your Market Squares to get all the +buys that you need.
Now just buy up a bunch of Provinces and any cards you need to 3-pile the game (if needed).
[edit] Strengths
This combo/engine has a lot going for it.
- It’s very fast. It may not seem like it, seeing as it takes around 10+ turns to build it up, but unlike most other engines, the “mid game” and “end game” phases happen entirely on one turn. This also makes it rather surprising for your opponent if they haven’t seen it before.
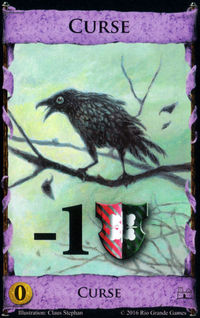
- It isn’t really affected by most attacks, with one or two exceptions (see below). Since you really only need to be able to play one Hermit each turn, hand size reduction attacks are pretty much moot. They will still slow you down a little, but likely not enough to matter. Cursers or Junkers don’t do much either, since (unless they are giving you coppers) you can use your Hermits to trash them out of your hand or discard pile.
- You only need to buy two cards (Hermit and Market Square) to pull this combo off, and both of them only cost
 . No need to build up to get the
  s or
s or  s or
s or  s.
s.
- Both of the cards you need are from the same expansion, meaning that this combo should show up fairly often when you’re playing with Dark Ages.
- Also, thematically, you have to admit this is one of the coolest/wackiest combos to play. You have droves of hermits wandering around outside of town, gradually going mad. Meanwhile you spend all your efforts building the largest grandest market square in the world, and then, on opening day, all of those insane hermits rush into town and run amok... And somehow you end up filthy rich and reigning over a massive kingdom. ;D
[edit] Weaknesses
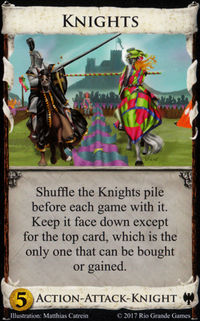
- While this combo resists most attacks, Trashers (such as Knights or Saboteur) can destroy it, as you need a lot of the right cards to pull it off. Also, being hit by a hand-size reducer attack on the turn when you’re ready to pull the trigger will stop it dead. If your opponent has built up an engine where he is Militia-ing you every turn it can be devastating.
- Possession, as it does to most combo decks, completely destroys it
- While you only need two types of cards, you need a LOT of those two cards. If your opponents are snatching them up as fast as you are it will sap a lot of the strength out of your deck.
- It is a high-skill combo, demanding a lot of attention to detail, and also requires a lot of buying restraint. It can be really hard to fight the temptation to buy that really awesome card when you get a lucky hand of coppers, but don’t do it!
[edit] Works well with:
-
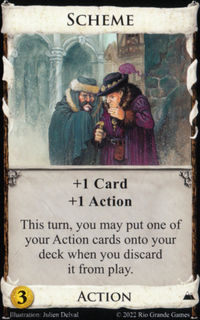
Scheme: which will let you turn your Hermits into Madmen without having to trash them. AtHermit no longer trashes itself, instead it's exchanged, so scheming it probably would prevent the exchange. it’s perfectly priced for this combo. -
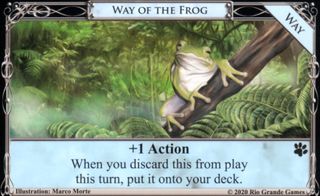
Way of the Frog: an even better version of Scheme; it lets you turn you Hermits into Madmen without having to trash them, does so non-terminallly, also helps line up your Madmen, and doesn't cost any gains or buys.same as scheme - Other nonterminal Ways allow you to play multiple Hermits in a turn to convert them into Madmen faster.
- Versus Cursers/Looters: all they do is give you fuel for your Hermits and Market Squares to turn into gold.
- Other cheap Trashers: can possibly be substituted for Hermits during your megaturn if you weren’t able to get as many as you wanted.
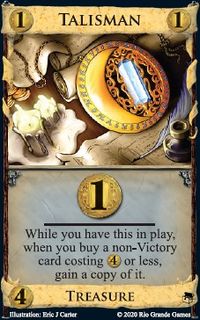
- Talisman: as an opener it can help you pick up components faster.
- Tactician/Haven allow you to start your turn with a slightly larger handsize.
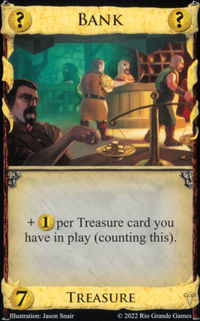
- Bank has an insane effect on your Golds - if you can find a time to pick up a Bank before you end the game!


[edit] Sample Games:
In solo play, I was able to set it up and was ready to pull the trigger by turn 12, but didn’t have any Madmen in my hand so I had to wait until turn 13. With 9 Hermits/Madmen and 9 Market Squares I ended up with over 70![]() to spend and 10 buys. Of course, that would be the perfect situation, and not very likely in a real game.
to spend and 10 buys. Of course, that would be the perfect situation, and not very likely in a real game.
I finally got a chance to try this against real opponents: it was a 3 player game, and I was able to snatch 9 Hermits and 5 Market Squares, and then I pulled the trigger around turn 12 (I lost track exactly) which was actually too early- I miscounted, and only had 5 madmen to my 4 Hermits (instead of 6-3) and the Kingdom wasn’t to the point where I could immediately end the game, but it still worked beautifully. I ended up with 35![]() and 6 buys, netting me 4 provinces and several Estates from my Hermits. Over the next several turns I was able to use all that gold to grab 2 more provinces and empty the estate pile to end the game well in the lead.
and 6 buys, netting me 4 provinces and several Estates from my Hermits. Over the next several turns I was able to use all that gold to grab 2 more provinces and empty the estate pile to end the game well in the lead.
The sample goko logs are no longer available, so if any wiki readers have logs they want to contribute, please add them here.
[edit] Sample Log:
H starts with 7 Coppers. H starts with 3 Estates. L starts with 7 Coppers. L starts with 3 Estates. H shuffles their deck. H draws 3 Coppers and 2 Estates. L shuffles their deck. L draws 5 cards.
Turn 1 - Hackybaby H plays 3 Coppers. (+$3) H buys and gains a Hermit. H draws 4 Coppers and an Estate.
Turn 1 - Lord Rattington L plays 4 Coppers. (+$4) L buys and gains a Silver. L draws 5 cards.
Turn 2 - Hackybaby H plays 4 Coppers. (+$4) H buys and gains a Hermit. H shuffles their deck. H draws 3 Coppers and 2 Estates.
Turn 2 - Lord Rattington L plays 3 Coppers. (+$3) L buys and gains a Silver. L shuffles their deck. L draws 5 cards.
Turn 3 - Hackybaby H plays 3 Coppers. (+$3) H buys and gains a Hermit. H draws 4 Coppers and a Hermit.
Turn 3 - Lord Rattington L plays 4 Coppers. (+$4) L buys and gains a Magpie. L draws 5 cards.
Turn 4 - Hackybaby H plays a Hermit. H looks at 3 Coppers, 2 Estates and a Hermit. H looks at 3 Coppers, 2 Estates and a Hermit. H trashes an Estate. H gains a Hermit. H plays 4 Coppers. (+$4) H buys and gains a Hermit. H shuffles their deck. H draws 2 Coppers, an Estate and 2 Hermits.
Turn 4 - Lord Rattington L plays a Silver and 2 Coppers. (+$4) L buys and gains a Magpie. L shuffles their deck. L draws 5 cards.
Turn 5 - Hackybaby H plays a Hermit. H trashes an Estate. H gains a Hermit. H plays 2 Coppers. (+$2) H trashes a Hermit. H gains a Madman. H draws 3 Coppers, an Estate and a Hermit.
Turn 5 - Lord Rattington L plays a Silver and 4 Coppers. (+$6) L buys and gains a Gold. L draws 5 cards.
Turn 6 - Hackybaby H plays a Hermit. H looks at a Madman, 2 Coppers and 2 Hermits. H gains a Hermit. H plays 3 Coppers. (+$3) H buys and gains a Hermit. H shuffles their deck. H draws 3 Coppers and 2 Hermits.
Turn 6 - Lord Rattington L plays a Magpie. L draws a card. L reveals a Copper. L puts a Copper into their hand. L plays 3 Coppers. (+$3) L buys and gains a Silver. L shuffles their deck. L draws 5 cards.
Turn 7 - Hackybaby H plays a Hermit. H gains a Hermit. H plays 3 Coppers. (+$3) H buys and gains a Market Square. H draws 3 Coppers and 2 Hermits.
Turn 7 - Lord Rattington L plays a Magpie. L draws a card. L reveals an Estate. L puts an Estate back onto their deck. L gains a Magpie. L plays a Gold, a Silver and 2 Coppers. (+$7) L buys and gains a Gold. L draws 5 cards.
Turn 8 - Hackybaby H plays a Hermit. H looks at 3 Coppers, 3 Hermits and a Market Square. H gains a Market Square. H trashes a Hermit. H gains a Madman. H draws a Copper, 3 Hermits and a Madman.
Turn 8 - Lord Rattington L plays a Silver and 3 Coppers. (+$5) L buys and gains a Magpie. L draws 5 cards.
Turn 9 - Hackybaby H plays a Hermit. H looks at a Madman, 6 Coppers, 4 Hermits and 2 Market Squares. H gains a Market Square. H trashes a Hermit. H gains a Madman. H shuffles their deck. H draws a Copper, an Estate, a Hermit, a Madman and a Market Square.
Turn 9 - Lord Rattington L plays a Magpie. L shuffles their deck. L draws a card. L reveals an Estate. L puts an Estate back onto their deck. L gains a Magpie. L plays 2 Silvers and 2 Coppers. (+$6) L buys and gains a Gold. L draws 5 cards.
Turn 10 - Hackybaby H plays a Hermit. H gains a Market Square. H trashes a Hermit. H gains a Madman. H draws a Copper and 4 Hermits.
Turn 10 - Lord Rattington L plays a Magpie. L draws a card. L reveals a Magpie. L puts a Magpie back onto their deck. L gains a Magpie. L plays a Silver and 3 Coppers. (+$5) L buys and gains a Magpie. L draws 5 cards.
Turn 11 - Hackybaby H plays a Hermit. H looks at 2 Madmen, a Copper, an Estate and 2 Market Squares. H gains a Market Square. H trashes a Hermit. H gains a Madman. H draws 3 Coppers, a Madman and a Market Square.
Turn 11 - Lord Rattington L plays a Magpie. L draws a card. L reveals an Estate. L puts an Estate back onto their deck. L gains a Magpie. L plays a Magpie. L draws a card. L shuffles their deck. L reveals a Copper. L puts a Copper into their hand. L plays 2 Golds and 3 Coppers. (+$9) L buys and gains a Province. L draws 5 cards.
Turn 12 - Hackybaby H plays a Market Square. H draws a Market Square. H plays a Market Square. H draws a Copper. H plays 4 Coppers. (+$4) H buys and gains a Market Square. H shuffles their deck. H draws 2 Coppers, a Hermit and 2 Madmen.
Turn 12 - Lord Rattington L plays a Magpie. L draws a card. L reveals a Silver. L puts a Silver into their hand. L plays a Magpie. L draws a card. L reveals a Silver. L puts a Silver into their hand. L plays a Magpie. L draws a card. L reveals an Estate. L puts an Estate back onto their deck. L gains a Magpie. L plays a Magpie. L draws a card. L reveals a Magpie. L puts a Magpie back onto their deck. L gains a Magpie. L plays a Gold, 3 Silvers and a Copper. (+$10) L buys and gains a Province. L draws 5 cards.
Turn 13 - Hackybaby H plays a Hermit. H gains a Market Square. H trashes a Hermit. H gains a Madman. H draws a Copper, a Hermit, 2 Madmen and a Market Square.
Turn 13 - Lord Rattington L plays a Magpie. L shuffles their deck. L draws a card. L reveals an Estate. L puts an Estate back onto their deck. L plays a Magpie. L draws a card. L reveals a Magpie. L puts a Magpie back onto their deck. L plays a Gold and 3 Coppers. (+$6) L buys and gains a Gold. L draws 5 cards.
Turn 14 - Hackybaby H plays a Madman. H returns a Madman to the Madman pile. H draws 3 Coppers and a Hermit. H plays a Madman. H returns a Madman to the Madman pile. H draws an Estate, a Hermit and 5 Market Squares. H plays a Market Square. H draws a Copper. H plays a Market Square. H draws a Madman. H plays a Madman. H returns a Madman to the Madman pile. H shuffles their deck. H draws 2 Coppers, 3 Madmen and a Market Square. H plays a Hermit. H trashes an Estate. H reacts with a Market Square. H discards a Market Square. H gains a Gold. H reacts with a Market Square. H discards a Market Square. H gains a Gold. H reacts with a Market Square. H discards a Market Square. H gains a Gold. H reacts with a Market Square. H discards a Market Square. H gains a Gold. H reacts with a Market Square. H discards a Market Square. H gains a Gold. H gains a Market Square. H plays a Madman. H returns a Madman to the Madman pile. H shuffles their deck. H draws 5 Golds and 6 Market Squares. H plays a Hermit. H trashes a Market Square. H reacts with a Market Square. H discards a Market Square. H gains a Gold. H reacts with a Market Square. H discards a Market Square. H gains a Gold. H reacts with a Market Square. H discards a Market Square. H gains a Gold. H reacts with a Market Square. H discards a Market Square. H gains a Gold. H reacts with a Market Square. H discards a Market Square. H gains a Gold. H gains a Market Square. H plays a Madman. H returns a Madman to the Madman pile. H shuffles their deck. H draws 5 Golds and 6 Market Squares. H plays a Hermit. H trashes a Market Square. H reacts with a Market Square. H discards a Market Square. H gains a Gold. H reacts with a Market Square. H discards a Market Square. H gains a Gold. H reacts with a Market Square. H discards a Market Square. H gains a Gold. H reacts with a Market Square. H discards a Market Square. H gains a Gold. H reacts with a Market Square. H discards a Market Square. H gains a Gold. H gains a Market Square. H plays a Madman. H returns a Madman to the Madman pile. H shuffles their deck. H draws 5 Golds and 6 Market Squares. H plays a Market Square. H plays a Market Square. H plays a Market Square. H plays a Market Square. H plays a Market Square. H plays a Market Square. H plays 15 Golds and 7 Coppers. (+$52) H buys and gains 6 Provinces.