First Game
Villafan001 (Talk | contribs) |
Villafan001 (Talk | contribs) |
||
| Line 49: | Line 49: | ||
==Strategies== | ==Strategies== | ||
| − | This recommended set is designed to expose the player to some of the key basic strategies available in Dominion, and to facilitate the learning of basic concepts without adding many of the additional complexities that come with other cards in the Base set and in later expansions. In keeping the game relatively simple, it is not typically expected that {{Card|Curse|Curses}} would feature in games using this set, there is only one [[Attack]], and there are no additional [[Victory card]] or [[Treasure]] options beyond the standard cards. However, even with this simplicity, this recommended set is an excellent demonstration of the scale of tactical variety which can be deployed in any one game of Dominion. | + | This recommended set is designed to expose the player to some of the key basic strategies available in Dominion, and to facilitate the learning of basic concepts without adding many of the additional complexities that come with other cards in the Base set and in later expansions. In keeping the game relatively simple, it is not typically expected that {{Card|Curse|Curses}} would feature in games using this set, there is only one [[Attack]], and there are no additional [[Victory card]] or [[Treasure]] options beyond the standard cards. However, even with this simplicity, this recommended set is an excellent demonstration of the scale of tactical variety which can be deployed in any one game of Dominion. Of course, the best strategies are likely to use a combination of the below ideas, and react to what one's opponent is doing and how long is left in the game - but a lot can be learned about the relative benefits of strategies and cards by testing out basic strategies and seeing how they compare. |
===Big Money=== | ===Big Money=== | ||
| Line 90: | Line 90: | ||
Any of the following could be used (alone, or in combination with others) as a payload for your engine: | Any of the following could be used (alone, or in combination with others) as a payload for your engine: | ||
*{{Card|Market}}, whose +Buy is likely to be very handy; | *{{Card|Market}}, whose +Buy is likely to be very handy; | ||
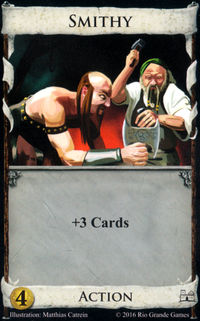
| − | *{{Card|Workshop}}, which especially if bought early on can gain {{Card|Village}} and {{Card| | + | *{{Card|Workshop}}, which especially if bought early on can gain {{Card|Village}} and {{Card|Smithy}} to build up your stack of engine pieces much more quickly; |
*{{Card|Militia}}, to provide +{{Cost|2}} towards buying other cards as well as slowing down your opponent through its strong handsize attack; and | *{{Card|Militia}}, to provide +{{Cost|2}} towards buying other cards as well as slowing down your opponent through its strong handsize attack; and | ||
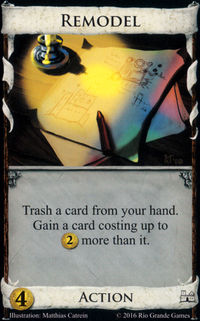
*{{Card|Remodel}}, which can upgrade your engine pieces throughout the game (e.g. turning your starting {{Card|Estate|Estates}} into {{Card|Village}} or {{Card|Smithy}}, {{Card|Moat}} into {{Card|Smithy}}, or {{Card|Village}} into {{Card|Market}}, as well as being a very useful endgame card for converting as much of your deck into {{VP}} when you anticipate the final turns arising (it can turn any {{Cost|3}} or {{Cost|4}}-cost card into a {{Card|Duchy}}, and most notably can convert {{Card|Gold}} into {{Card|Province}}. Choosing the right time to pull off these exchanges can often be the difference between winning and losing - too early and you risk stalling your engine, too late and your opponent may end the game before you get the chance. | *{{Card|Remodel}}, which can upgrade your engine pieces throughout the game (e.g. turning your starting {{Card|Estate|Estates}} into {{Card|Village}} or {{Card|Smithy}}, {{Card|Moat}} into {{Card|Smithy}}, or {{Card|Village}} into {{Card|Market}}, as well as being a very useful endgame card for converting as much of your deck into {{VP}} when you anticipate the final turns arising (it can turn any {{Cost|3}} or {{Cost|4}}-cost card into a {{Card|Duchy}}, and most notably can convert {{Card|Gold}} into {{Card|Province}}. Choosing the right time to pull off these exchanges can often be the difference between winning and losing - too early and you risk stalling your engine, too late and your opponent may end the game before you get the chance. | ||
| + | |||
| + | ===Cantrip Rush=== | ||
| + | It is worth noting that three of the cards in this kingdom are [[cantrip|cantrips]], that is to say offer at least +1 Action and +1 Card (thus replacing themselves): {{Card|Village}}, {{Card|Merchant}} and {{Card|Market}}. In addition to this basic ability, each of the cards offers a different incremental benefit: | ||
| + | *{{Card|Village}} offers +1 Action; | ||
| + | *{{Card|Merchant}} offers +{{Coin|1}} if you play a {{Card|Silver}} in the same turn; and | ||
| + | *{{Card|Market}} offers +1 Buy and +{{Cost|1}}. | ||
| + | |||
| + | Since cantrips are "invisible" in one's deck in most cases, one simple strategy is also to simply buy as many of them as possible for the incremental benefits they provide. Of these benefits, +1 Action on its own is of no use (hence why {{Card|Village}} should be combined with an engine strategy. However, each of {{Card|Merchant}} and {{Card|Market}} can, in theory at least, be used to build up a deck solely by buying as many copies of those cards as possible (perhaps with some supplementary Villages or terminals). | ||
| + | *{{Card|Merchant}}'s benefit is reasonably marginal, however it is cheap to buy, and gain be gained by {{Card|Workshop}} - so it may be possible to gain a large number of them and play several in a single turn for a large {{Cost}} benefit when playing a Silver. | ||
| + | *{{Card|Market}} is more expensive, but gives the same {{Cost|1}} regardless of whether you have a Silver to play, and also gives +1 Buy to enable the purchase of multiple cards in one turn. | ||
| + | Several copies of these cards, combined with either [[Treasure]] or engine components, are also capable of forming a decent deck. | ||
| + | |||
| + | ==Openings== | ||
| + | A wide variety of different openings are possible, depending on (i) what your starting hands are and (ii) what strategy you are attempting to play. | ||
| + | |||
| + | ===4 / 3 split=== | ||
| + | *Silver/Silver | ||
| + | *Silver/Moat | ||
| + | *Silver/Merchant | ||
| + | *Silver/Workshop | ||
| + | *Silver/Smithy | ||
| + | *Silver/Militia | ||
| + | *Silver/Remodel | ||
| + | |||
| + | The following are probably lesser-advised: | ||
| + | *Opening with Village | ||
| + | *Opening with Cellar | ||
| + | *Opening with Merchant and not Silver | ||
| + | *Opening with Workshop and another terminal Action | ||
| + | |||
| + | ===5 / 2 split=== | ||
| + | *Market / Moat | ||
| + | *Mine / Moat | ||
| + | *Market/Cellar | ||
| + | *Mine/Cellar | ||
Revision as of 19:51, 10 January 2019

First Game is a recommended set using only cards from the Base set. It is the first recommended set of 10 contained within Dominion, and is designed as an introductory game to demonstrate the basic card types and to allow new players to explore some of the most basic strategies available in Dominion, most notably simple engines and Big Money-style tactics.
Contents |
Cards
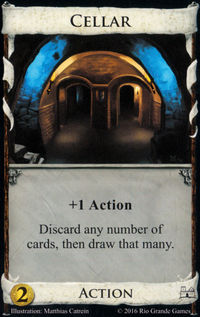

Cellar
Main article: Cellar
A card costing ![]() that acts as a sifter, replacing cards you do not want in your hand with an equal number of cards from the top of your deck.
that acts as a sifter, replacing cards you do not want in your hand with an equal number of cards from the top of your deck.
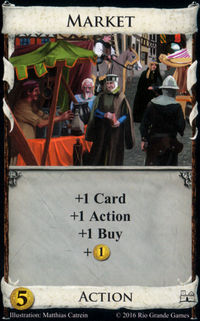
Market
Main article: Market
A card costing ![]() that is a cantrip (meaning that it gives +1 Card/+1 Action and does not prevent you from drawing or playing other action cards) which also gives you +
that is a cantrip (meaning that it gives +1 Card/+1 Action and does not prevent you from drawing or playing other action cards) which also gives you +![]() and +1 Buy - a little bit of everything.
and +1 Buy - a little bit of everything.
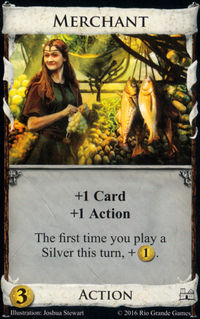
Merchant
Main article: Merchant
A cantrip costing ![]() that gives you +
that gives you +![]() if you are able to play a Silver after it in the same turn.
if you are able to play a Silver after it in the same turn.
Militia
Main article: Militia
An Attack costing ![]() that is a handsize attack, making opponents discard down to three cards in hand. It is also a terminal silver, giving +
that is a handsize attack, making opponents discard down to three cards in hand. It is also a terminal silver, giving +![]() but no +Action.
but no +Action.
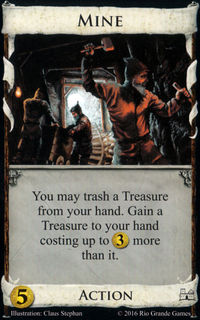
Mine
Main article: Mine
A card costing ![]() that is a trash for benefit card applying only to Treasures, allowing you to trash your Coppers to gain Silvers and trash your Silvers to gain Golds, gaining the upgraded treasures directly to your hand for immediate use.
that is a trash for benefit card applying only to Treasures, allowing you to trash your Coppers to gain Silvers and trash your Silvers to gain Golds, gaining the upgraded treasures directly to your hand for immediate use.
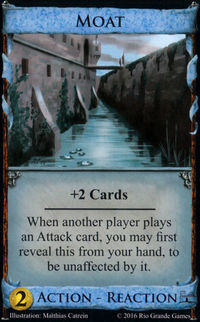
Moat
Main article: Moat
A dual-purpose Reaction card costing ![]() : when played, it gives +2 Cards, and if it is in your hand when an Attack card is played, then you are immune to the attack.
: when played, it gives +2 Cards, and if it is in your hand when an Attack card is played, then you are immune to the attack.
Remodel
Main article: Remodel
A card costing ![]() that is a flexible trash for benefit card which allows you to trash a card from your hand, and gain a card costing up to
that is a flexible trash for benefit card which allows you to trash a card from your hand, and gain a card costing up to ![]() more, thus improving your deck.
more, thus improving your deck.
Smithy
Main article: Smithy
A terminal draw card costing ![]() which gives +3 Cards, allowing you to obtain an increase in handsize, but not giving any +Action.
which gives +3 Cards, allowing you to obtain an increase in handsize, but not giving any +Action.
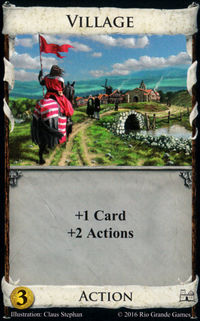
Village
Main article: Village
A card costing ![]() which gives you +1 card from the deck and +2 actions, allowing you to play more than one terminal action each turn.
which gives you +1 card from the deck and +2 actions, allowing you to play more than one terminal action each turn.
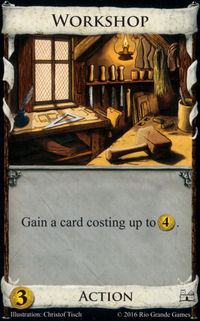
Workshop
Main article: Workshop
A card costing ![]() which is a gainer, allowing you to gain cards without buying them; though it is limited to cards costing up to
which is a gainer, allowing you to gain cards without buying them; though it is limited to cards costing up to ![]() .
.
Strategies
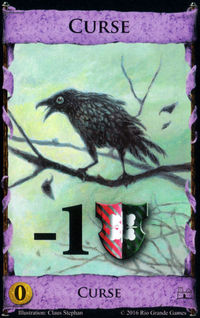
This recommended set is designed to expose the player to some of the key basic strategies available in Dominion, and to facilitate the learning of basic concepts without adding many of the additional complexities that come with other cards in the Base set and in later expansions. In keeping the game relatively simple, it is not typically expected that Curses would feature in games using this set, there is only one Attack, and there are no additional Victory card or Treasure options beyond the standard cards. However, even with this simplicity, this recommended set is an excellent demonstration of the scale of tactical variety which can be deployed in any one game of Dominion. Of course, the best strategies are likely to use a combination of the below ideas, and react to what one's opponent is doing and how long is left in the game - but a lot can be learned about the relative benefits of strategies and cards by testing out basic strategies and seeing how they compare.
Big Money
Main article: Big Money
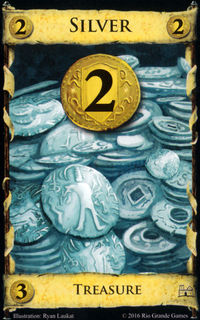
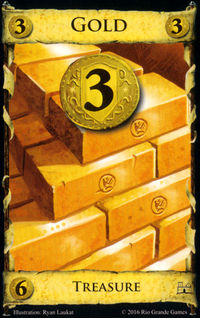
At its simplest, Big Money can be played as follows: buy Province with ![]() , buy Gold with
, buy Gold with ![]() -
-![]() , buy Silver with
, buy Silver with ![]() -
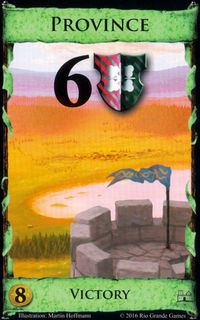
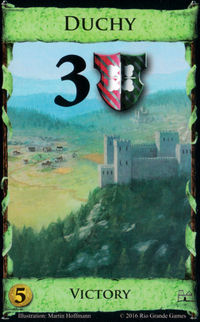
-![]() , and don't buy anything else. It will not take many Dominion players long to learn that this is a reasonably mediocre and fairly boring strategy, however its key feature is that the possibility of doing it will be present in every single game of Dominion, no matter how many expansions are used or how complex the kingdom is. It therefore provides two key learning opportunities: (i) learning how Big Money be optimised by including complementary Action cards within one's deck and choosing the opportune moment to buy Duchies, and (ii) providing a barometer against which all other strategy ideas can be judged - if it won't beat Big Money, then you should just play Big Money (or better still, develop a strategy that is better still).
, and don't buy anything else. It will not take many Dominion players long to learn that this is a reasonably mediocre and fairly boring strategy, however its key feature is that the possibility of doing it will be present in every single game of Dominion, no matter how many expansions are used or how complex the kingdom is. It therefore provides two key learning opportunities: (i) learning how Big Money be optimised by including complementary Action cards within one's deck and choosing the opportune moment to buy Duchies, and (ii) providing a barometer against which all other strategy ideas can be judged - if it won't beat Big Money, then you should just play Big Money (or better still, develop a strategy that is better still).
In this kingdom, the most likely choices of Action card to buy that will assist with playing a Big Money strategy are:
- Smithy, to facilitate the classic "Smithy - Big Money" strategy by increasing handsize to maximise the chance of hitting
 ;
;
- Mine, allowing you to speed up the process of acquiring Silvers and Golds; and
- Cellar, allowing you to bypass Victory cards in your deck (particularly useful if you do not trash your initial Estates,
but most of the other cards can also be incorporated into what is essentially a Big Money deck ({{Card|Merchant will give you money for playing Silver, Remodel may allow you to quickly speed up the endgame etc.).
Cards that it is probably unwise to purchase if attempting a Big Money strategy are:
- Workshop: since this only permits gaining cards up to
 , the only card you are likely to want within that price band is Silver, but there will come a point where having too many Silvers becomes a hindrance since you would rather be drawing Gold in their place, because in order to buy a Province, four Silvers are required in a hand of five as opposed to three Golds (or two Golds and a Silver);
- Moat, simply because its +2 Cards are not as good as Smithy's +3 Cards (unless your opponent has bought Militia and you can therefore benefit from its defensive ability); and
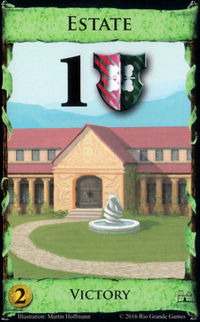
- Village, whose +1 Card ability simply replaces itself, and so whose real benefit is in its +2 Actions, which are no good to you if you have no other Action cards to play (nobody wants to be a Village idiot!) - but see Engines below for where these will come in handy.
Engines
Main article: Engine
Contrasting with a Big Money deck and its one or two choice Action cards, an engine aims to buy many Action cards and chain them together each turn. Every successful engine will likely need several components, breaking down into three key categories:
- Template:Village (card category), that is to say cards offering +2 Actions (or more);
- Something allowing you to draw more cards (most typically terminal draw since you will already have sufficient Actions; and
- Some sort of payload, i.e. something that you are aiming to play as frequently as possible in order to achieve an effect that cannot be achieved by Big Money - this could be + Buy, it could be playing a gainer to acquire more cards, it could be an Attack - as you go on in Dominion and play with more expansions, the possibilities become (almost) endless.
The typical engine strategy is therefore going to consist of playing +Actions to enable more terminals to be played, playing +Cards to increase handsize and maximise the chance of drawing the payload, and then playing the payload, with the aim of all of that being to leave enough ![]() to eventually start to buy Provinces (perhaps, with +Buy, more than one in a turn).
to eventually start to buy Provinces (perhaps, with +Buy, more than one in a turn).
In this kingdom, the most likely choices of Action card to support an engine strategy are:
- Village, an absolute must for its +2 Actions and the fundamental part of any engine; and
- Smithy, for its handsize increase (Moat will work too, clearly it draws fewer cards but is cheaper and has a defensive benefit);
- your choice of payload (as to which, see below).
In terms of the less important cards for engine players:
- Cellar is probably going to be less of a help to engines - of course deck cycling is useful, particularly to avoid Victory cards later in the game, the idea with an engine is to render much if not all of your hand playable in any given turn, which should lessen the need to discard and re-draw cards because of terminal clash and you would typically be aiming for a big enough handsize to be able to work around Victory cards; and
- Mine may fall lower down the pecking order if your engine is using cards to produce +
 , leaving you less reliant on Treasure.
Payload Strategies
Any of the following could be used (alone, or in combination with others) as a payload for your engine:
- Market, whose +Buy is likely to be very handy;
- Workshop, which especially if bought early on can gain Village and Smithy to build up your stack of engine pieces much more quickly;
- Militia, to provide +
 towards buying other cards as well as slowing down your opponent through its strong handsize attack; and
- Remodel, which can upgrade your engine pieces throughout the game (e.g. turning your starting Estates into Village or Smithy, Moat into Smithy, or Village into Market, as well as being a very useful endgame card for converting as much of your deck into
 when you anticipate the final turns arising (it can turn any
  or -cost card into a Duchy, and most notably can convert Gold into Province. Choosing the right time to pull off these exchanges can often be the difference between winning and losing - too early and you risk stalling your engine, too late and your opponent may end the game before you get the chance.
Cantrip Rush
It is worth noting that three of the cards in this kingdom are cantrips, that is to say offer at least +1 Action and +1 Card (thus replacing themselves): Village, Merchant and Market. In addition to this basic ability, each of the cards offers a different incremental benefit:
- Village offers +1 Action;
- Merchant offers +
 if you play a Silver in the same turn; and
- Market offers +1 Buy and +.
Since cantrips are "invisible" in one's deck in most cases, one simple strategy is also to simply buy as many of them as possible for the incremental benefits they provide. Of these benefits, +1 Action on its own is of no use (hence why Village should be combined with an engine strategy. However, each of Merchant and Market can, in theory at least, be used to build up a deck solely by buying as many copies of those cards as possible (perhaps with some supplementary Villages or terminals).
- Merchant's benefit is reasonably marginal, however it is cheap to buy, and gain be gained by Workshop - so it may be possible to gain a large number of them and play several in a single turn for a large benefit when playing a Silver.
- Market is more expensive, but gives the same regardless of whether you have a Silver to play, and also gives +1 Buy to enable the purchase of multiple cards in one turn.
Several copies of these cards, combined with either Treasure or engine components, are also capable of forming a decent deck.
Openings
A wide variety of different openings are possible, depending on (i) what your starting hands are and (ii) what strategy you are attempting to play.
4 / 3 split
- Silver/Silver
- Silver/Moat
- Silver/Merchant
- Silver/Workshop
- Silver/Smithy
- Silver/Militia
- Silver/Remodel
The following are probably lesser-advised:
- Opening with Village
- Opening with Cellar
- Opening with Merchant and not Silver
- Opening with Workshop and another terminal Action
5 / 2 split
- Market / Moat
- Mine / Moat
- Market/Cellar
- Mine/Cellar